Developing For Runsafe
NOT YET COMPLETE
Runsafe is an open-source project which means anyone can write code and we'll accept it providing the idea is liked and the code works! Below is a detailed guide on how to set-up a decent development environment for Runsafe and how to submit your changes to us!
Contents
Step 1: Git
Step 1A: Download
Navigate to the Git download page (http://git-scm.com/downloads) and from the top, select your operating system, for this guide we are using Windows. This will take you to another page where the download of the installer will start, once it's completed, run the installer executable and move onto the next step.
Step 1B: Installation
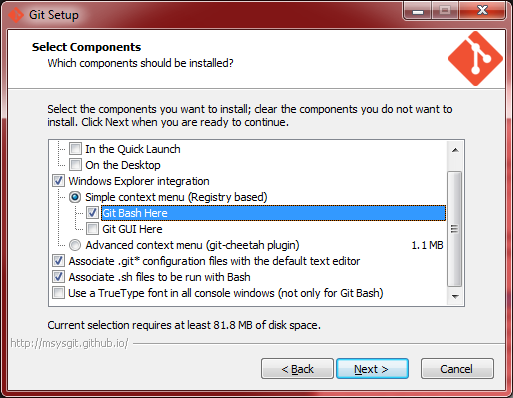
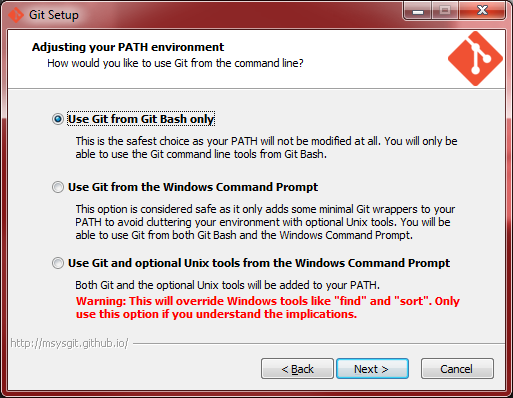
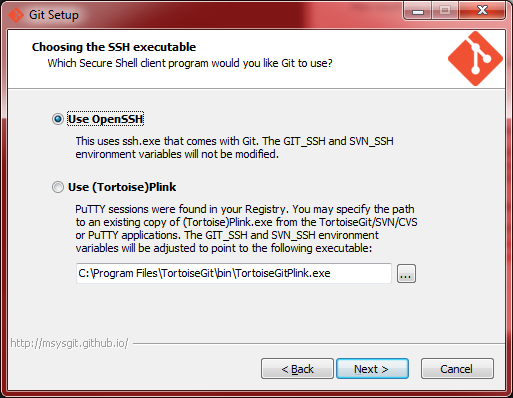
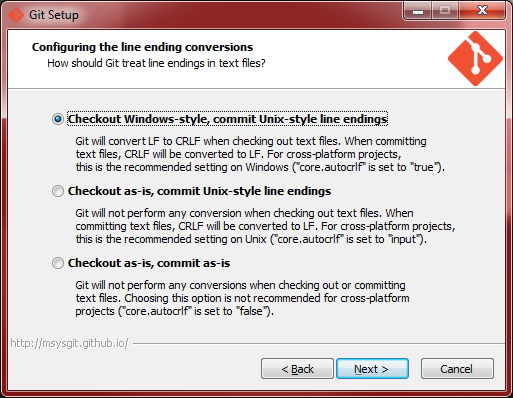
Follow the installation wizard through step-by-step and make sure your options match the images below.
Once the installation wizard is complete, you can click Finish and then move onto the next step.
Step 1C: Set your details
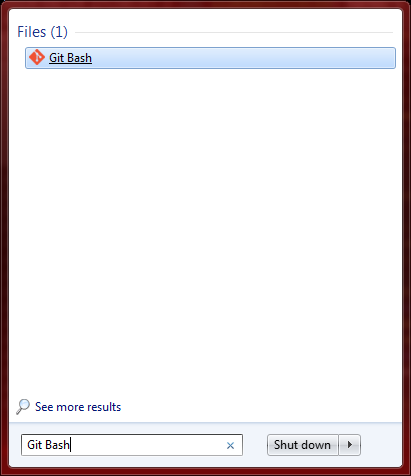
This guide is assuming you have a GitHub account already set-up, if not you should go and do that now, this guide won't explain how to do that as it should be easy to figure out! Open up GitBash, you can do this by the short-cut on your desktop (if you selected that option) or through the start-menu (see image below).
Once you've clicked that you should see a Git console window, the first thing we're going to do is set your name which will appear on commits, this will make it easier to figure out who you are. Type in the command below and hit enter, obviously putting your name between the quotation marks.
git config --global user.name "Your Name Here"
Next we're going to do the same, but with your e-mail address, this step is important as it is used by GitHub to figure out who you are when pushing changes. Type in the command below and hit enter, obviously putting your e-mail address between the quotation marks. IMPORTANT: The e-mail address must be the one you used when creating your GitHub account.
git config --global user.email "your_email@example.com"
Steo 1D: Generating an SSH key
If you already have one, you can skip this step
Run this command:
ssh-keygen
This will create a new folder ".ssh" in your home directory. You need to add the public key from this folder to your github account.
Step 2: Grabbing a Project
Step 2A: Choose the project
Navigate to our GitHub profile (https://github.com/Runsafe/) and find the project you are wanting to make changes to, for this example we will be using Cheeves. Note the exact name we've using for the project and keep the page open as we'll be needing it again shortly.
Step 2B: Create a local repository
Find somewhere on your computer to store the files and create a new folder, call it the same thing we've called the project, as we're using Cheeves for this example, the folder we create will be called Cheeves, with matching case.
Right-click on the folder you've just created and select the option Git Bash Here, this will open a Git console. Type in git init to initialize your local repository, this should display the message "Initialized empty Git repository in <directory_location>". Keep the console window open as you will need it again shortly.
Step 2C: Pull the project from our GitHub
Go back onto the project page for the repository you are editing, Cheeves in this example. Make sure you are logged into your GitHub account and hit the Fork button in the top-right of the page. It might take a moment but when it's done, you will have a copy of the repository on your GitHub account which it should automatically navigate to. In the bottom-right you should see a small text-field with the text "You can clone with HTTPS, SSH, or Subversion." below it. Click on HTTPS and then copy the contents of the text-field which should look something similar to https://github.com/Kruithne/Cheeves.git. Switch back to the Git console window you should still have open from step 2B and type in the following command, replacing the URL at the end with the one you just copied.
git remote add origin https://github.com/Kruithne/Cheeves.git
TIP: To paste into the Git console window, you can paste by right-clicking on the title bar, go to Edit and select Paste.
Step 2D: Pull the code
Now we can pull the code down rather easily using the following command.
git pull origin master
It shouldn't take too long and when it's done, all of the code for the repository will be inside your folder. Keep the Git console window open, as we'll need it again later.
Step 3: IntelliJ
Editing code on GitHub and with Notepad is easy and it works, but it's not intelligent and causes a lot of errors. Ideally you want to have an IDE set-up and this section of the guide will explain how to get our IDE of choice set-up, IntelliJ.
Step 3A: Download
Navigate to the download page for IntelliJ (http://www.jetbrains.com/idea/download/) and select the community edition (it's free) and follower the installer through. Once it's installed, don't run IntelliJ just yet, we've got some more things to do!
Step 3B: Grab the Framework (and it's libraries)
Follow this step carefully! Go to our Jenkins page for the framework (https://jenkins.runsafe.no/job/Framework/) and on the middle of the page, you will see a package icon, with a link to the Last Successful Artifacts of the job. In this case; framework.jar click to download it. The framework JAR file that gets downloaded should be placed in a folder name out placed NEXT to your repository, like in the image below.
Now the framework also needs things to run, so for this we will be downloading the framework source code. The same place you created the out folder, create a folder named Framework, case is importance here. Right click on the folder and select Git Bash Here, this will open a console window, type in the following commands in order.
git init
git pull https://github.com/Runsafe/Framework.git
This might take a while to pull, but once it's done you can close the console window. It's important that your repository, for this example it would be Cheeves; Framework and out are all in the same place. Any future repositories that you create for Runsafe should be in the same place alongside those folders. You can move them to another place on your computer if you wish, but they should all be moved together as they work relative to one another.
Step 4: Begun, the coding has
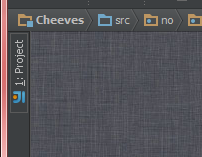
Providing you followed every step above perfectly, everything should be ready to go now. Open IntelliJ and select "File" -> "Open...". Navigate to where your repository is and select it, then click open. When it opens, you will want to click the button "Project" on the far left, see the image below.
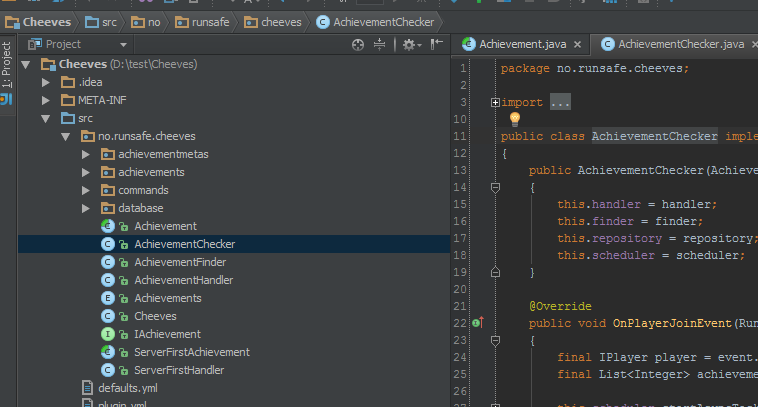
Expanding through the directories will bring you to the source files (see the next image), double clicking a file will open it for editing. If everything is red and scary, you've probably done something wrong. Please note some of our plug-ins like CreativeToolbox will require more libraries which are not explained in this guide, you should stick to simple plug-ins until you understand how to set them up yourself!
Step 5: To me, to you!
Step 5A: Push changes...
Once you've made some changes (check there are no errors ahoy first) go to where your repository is again and right-click on it, select 'Git Bash Here. Now type in the commands below, carefully replacing the details you need to.
git add -A
git commit -m "COMMIT MESSAGE HERE"
git push origin master
A good commit message should describe why you made the change, in less than 50 characters. Don't bother listing what changed in the code, the commit diff will cover that perfectly well on its own.
Please note that "Changes" is not a valid commit message and we will most likely reject it, we should be able to figure out exactly what you've done with the commit message. Check commits by Kruithne and docpify for examples of how to make decent commit messages. Providing everything goes well, your changes should now have been pushed to your GitHub fork of Cheeves, or whichever plug-in you are using for this guide.
Step 5B: Pull request!
The code is now on your repository on GitHub, but that's not quite it yet! You need to make a pull request to us, this will allow us to review the changes you've made and if everything is done right, we'll accept them onto the main repository and your code will be one with ours! To do this, navigate to your repository, for example https://github.com/Kruithne/Cheeves would be mine in this guide, and on the right-hand side select Pull Requests.
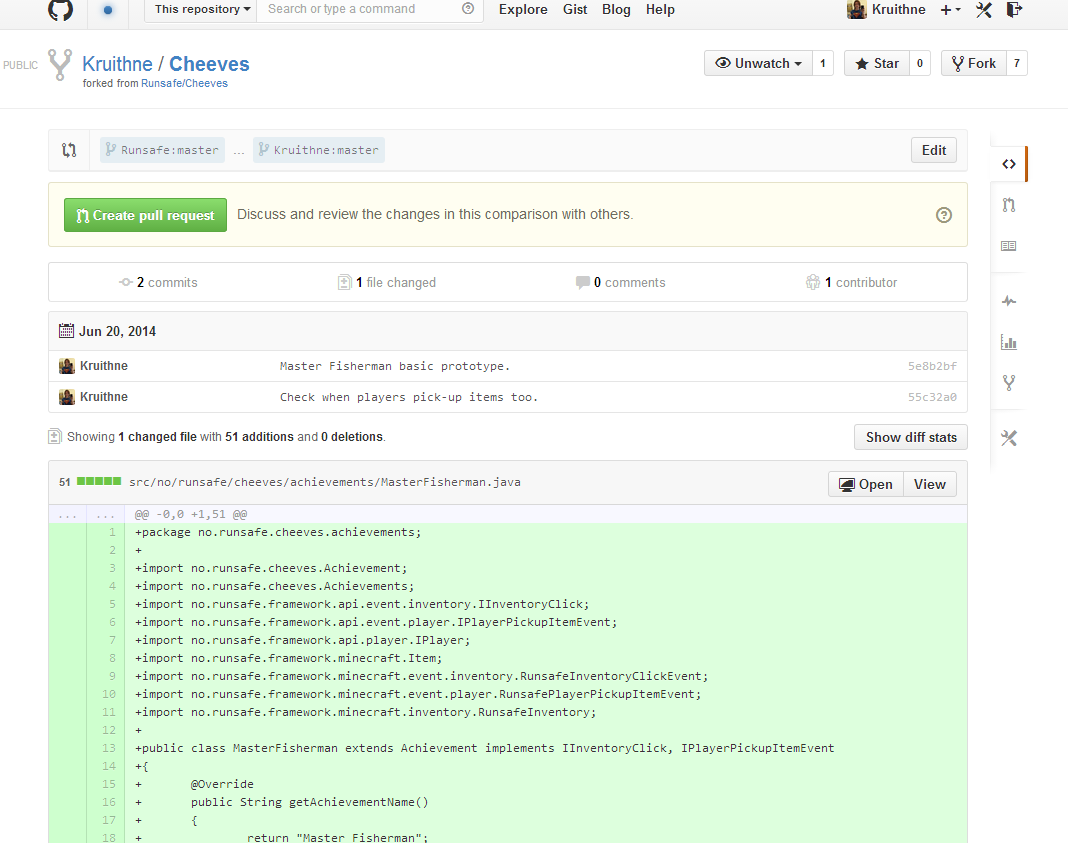
In the top-right, select the green button that says New Pull Request, if everything so far has been done right you should see the changes you've made ready to be sent to us, like in the image below. Select the green button at the top that says Create Pull Request and fill out a title and description for us, click submit!
Step 6: Keeping Up-to-date!
Rather than have to repeat EVERYTHING when you want to make a change, simply go back to step 2D and pull the code into your repository. You should make sure your repo is up-to-date before starting to edit it, otherwise this is a quick way to run into conflict errors.
Appendixes
Git Bash tips and tricks
Updating all your repositories
If you want to update all your repositories, you can do it all with a single command with the power of bash! Open Git Bash on the folder containing your repositories and run this command;
for i in */.git; do (cd $i/..; pwd; git pull); done
Checking all your repositories for uncommitted changes
Again, open Git Bash on the folder containing your repositories and run this command;
for i in */.git; do (cd $i/..; pwd; git status); done
Pushing all your repositories to github
Once again, open Git Bash on the folder containing your repositories and run this command;
for i in */.git; do (cd $i/..; pwd; git push); done
.. Maybe you've spotted the pattern by now?
